
Civic EK 12.3-inch Cluster
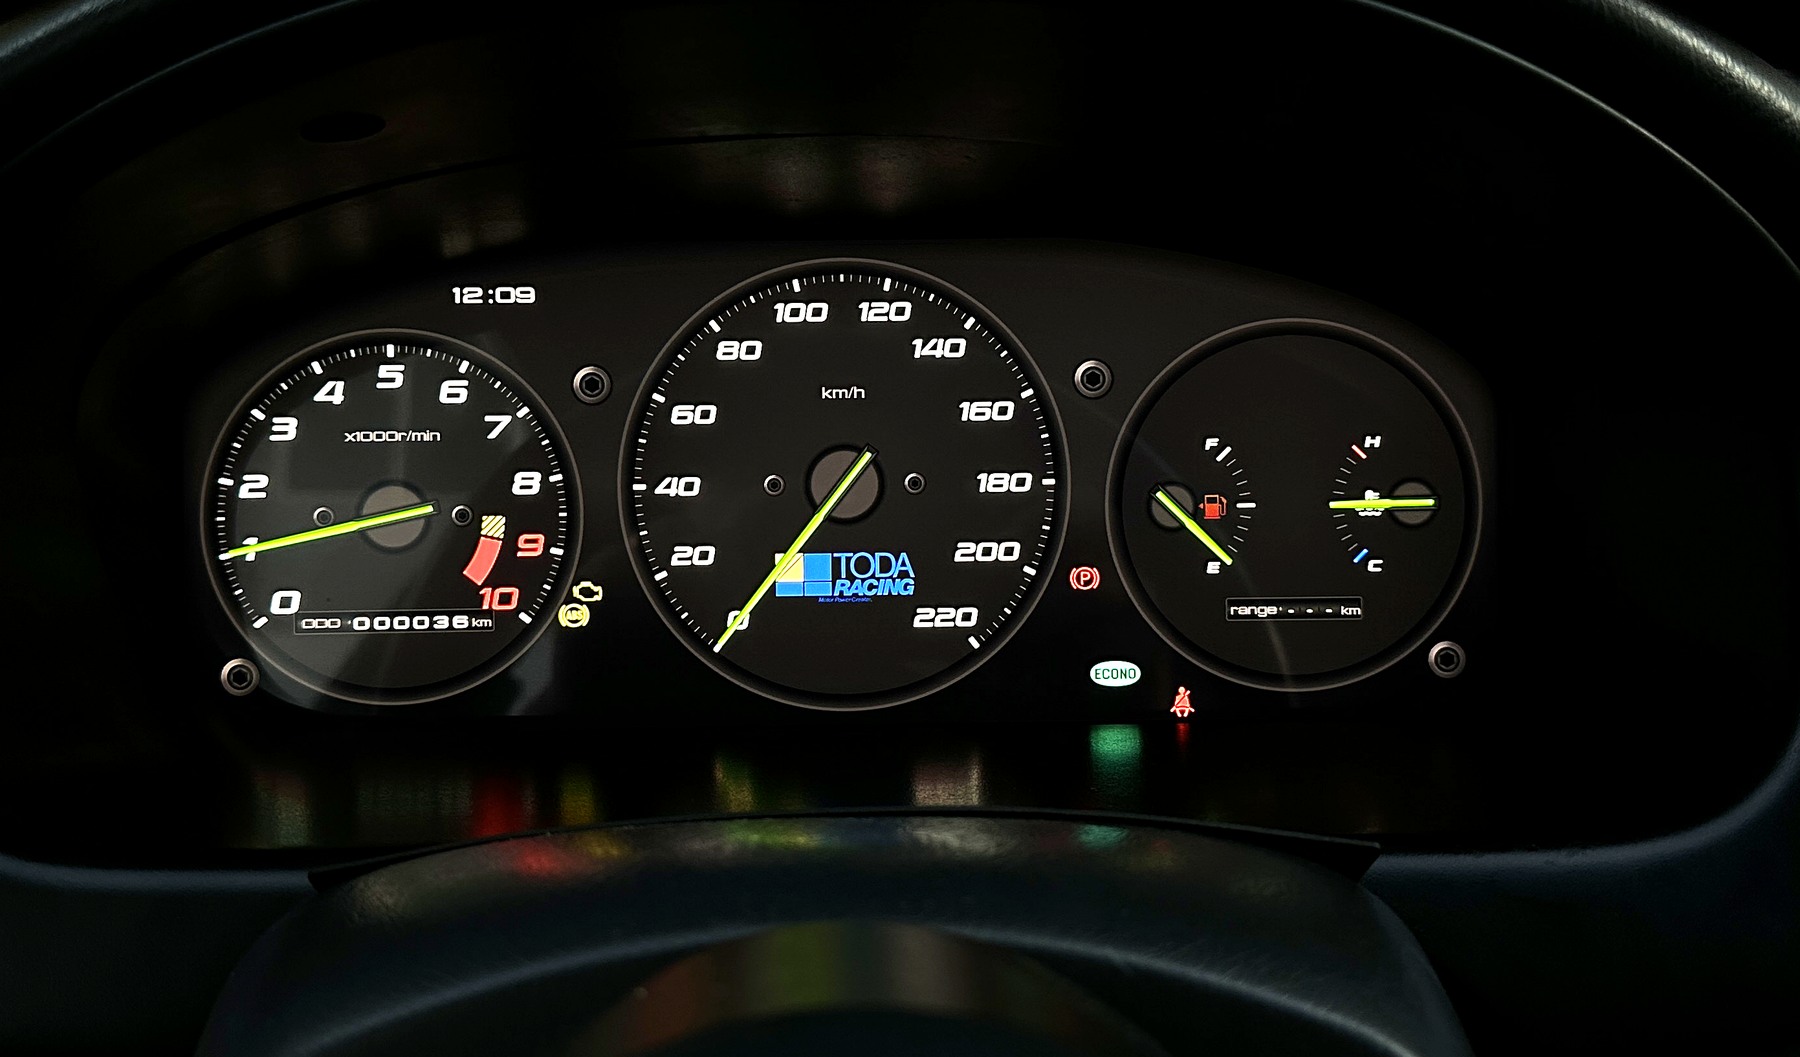
A 12.3-inch LCD cluster that fits the factory cluster opening of an EK Civic. The plugs go straight in. Nothing gets cut, and you can put the stock cluster back whenever you want. Fits 1996–2000 Civic (EK / EJ / EM) and 1997–2001 CR-V (RD1).
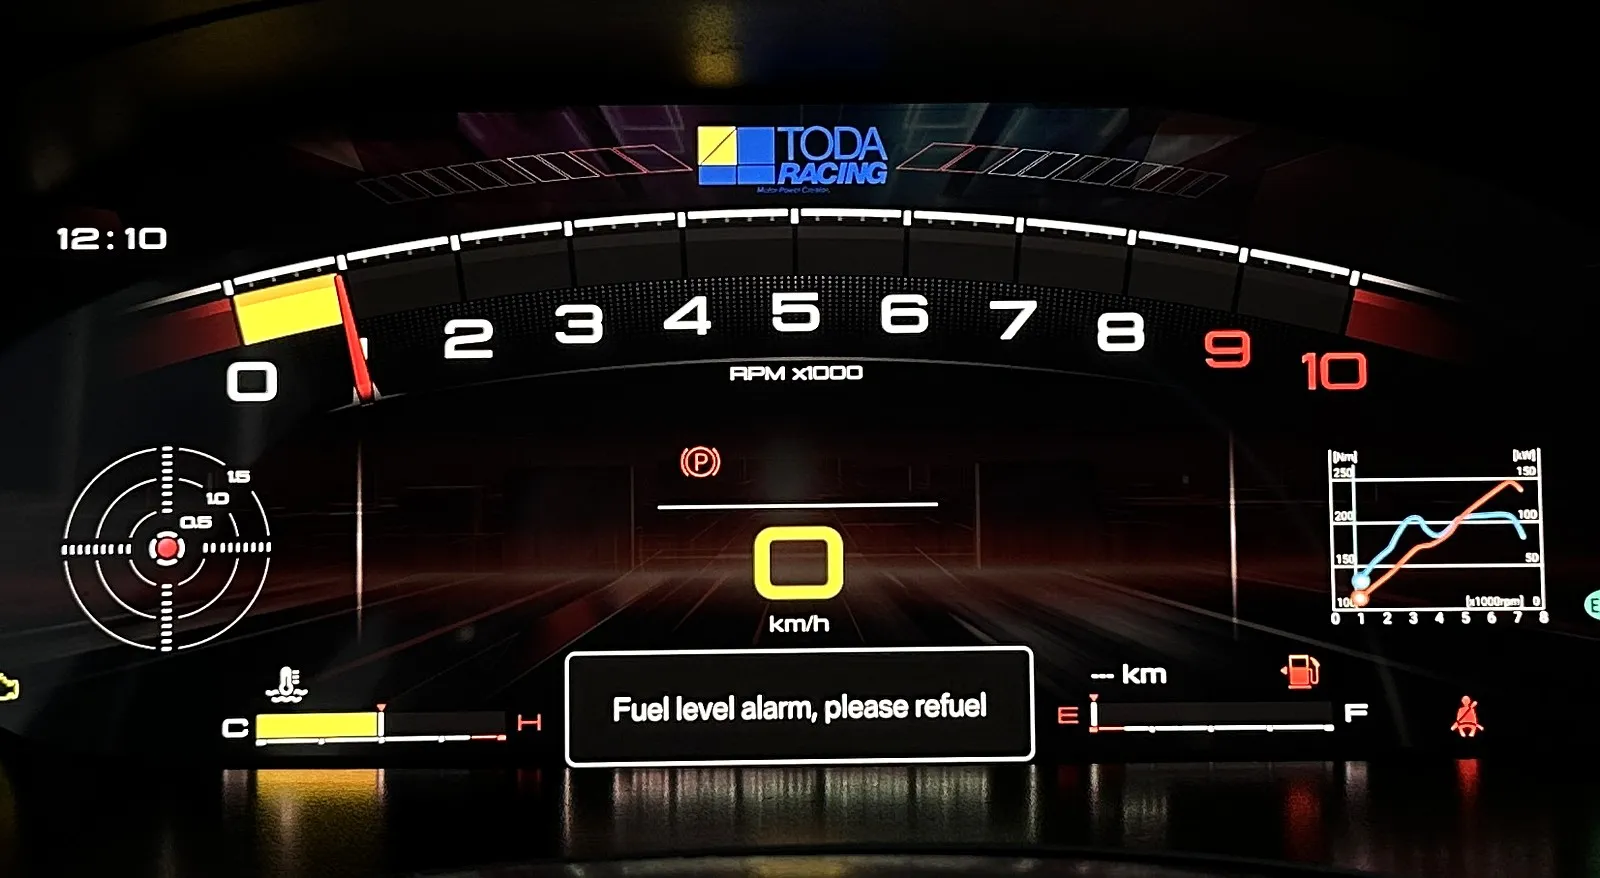
The stock digits are small and hard to read at night, and realistically you only ever look at RPM and speed. This screen pulls RPM, speed, fuel, coolant temp, gear and G-force into one place, drawn the way a cluster is drawn — not a tablet stuck on the dash.
Fitment
Section titled “Fitment”| Vehicle | Years | Chassis code |
|---|---|---|
| Honda Civic | 1996–2000 | EK2, EK3, EK4, EK8, EK9, EJ6, EJ8, EJ9, EM1 |
| Honda CR-V | 1997–2001 | RD1 |
Trim differs within the same model year. Check the chassis code before ordering, not the year.
In the Car
Section titled “In the Car”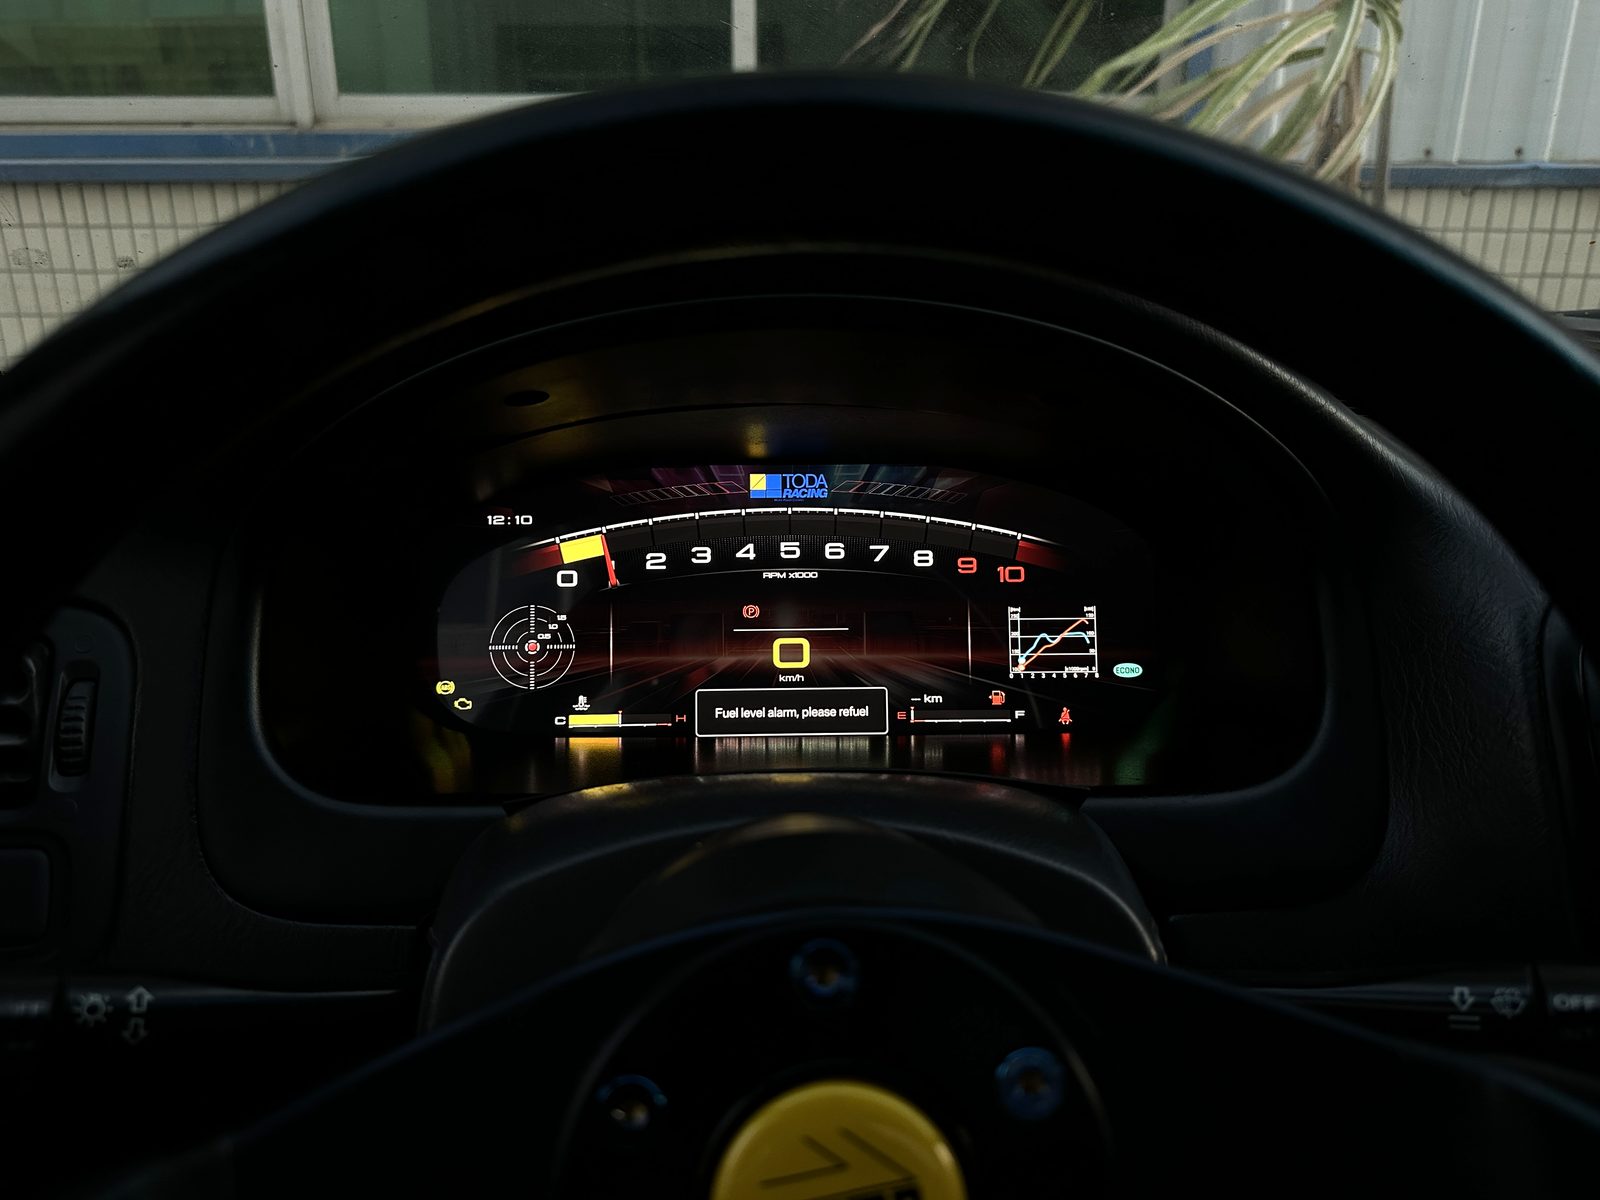
Features at a Glance
Section titled “Features at a Glance”All 12 features are broken down below in Feature Details. Screen specs, connectors and warranty are on the Specs page.
| # | Feature | What it does |
|---|---|---|
| 1 | 12.3-inch LCD | 1920×720, dual LVDS, 16.7M colors, −30~85℃ |
| 2 | Six layouts, 13 badges | Switch on the cluster itself — no app, no extra hardware |
| 3 | Custom vehicle logo | Logos are built in; a small flash unlocks the picker |
| 4 | Vehicle data | Speed, RPM, fuel and coolant temp on one screen |
| 5 | Built-in G-sensor | 3-axis MEMS, sampled on its own — no ECU data |
| 6 | Manual / auto gear display | Auto shows P / R / N / D on the right dial; manual hides the column |
| 7 | Adjustable RPM scale | 8000 / 9000 / 10000 / 11000 rpm |
| 8 | Adjustable speed scale | 180 / 220 / 240 km/h |
| 9 | Shift light | Red bar flashes across the top at your set RPM |
| 10 | Multilingual menu | 12 languages |
| 11 | Plug and play | Factory connectors into the factory harness, fully reversible |
| 12 | Warranty and fitment check | 12-month warranty; confirm the chassis code first |
Feature Details
Section titled “Feature Details”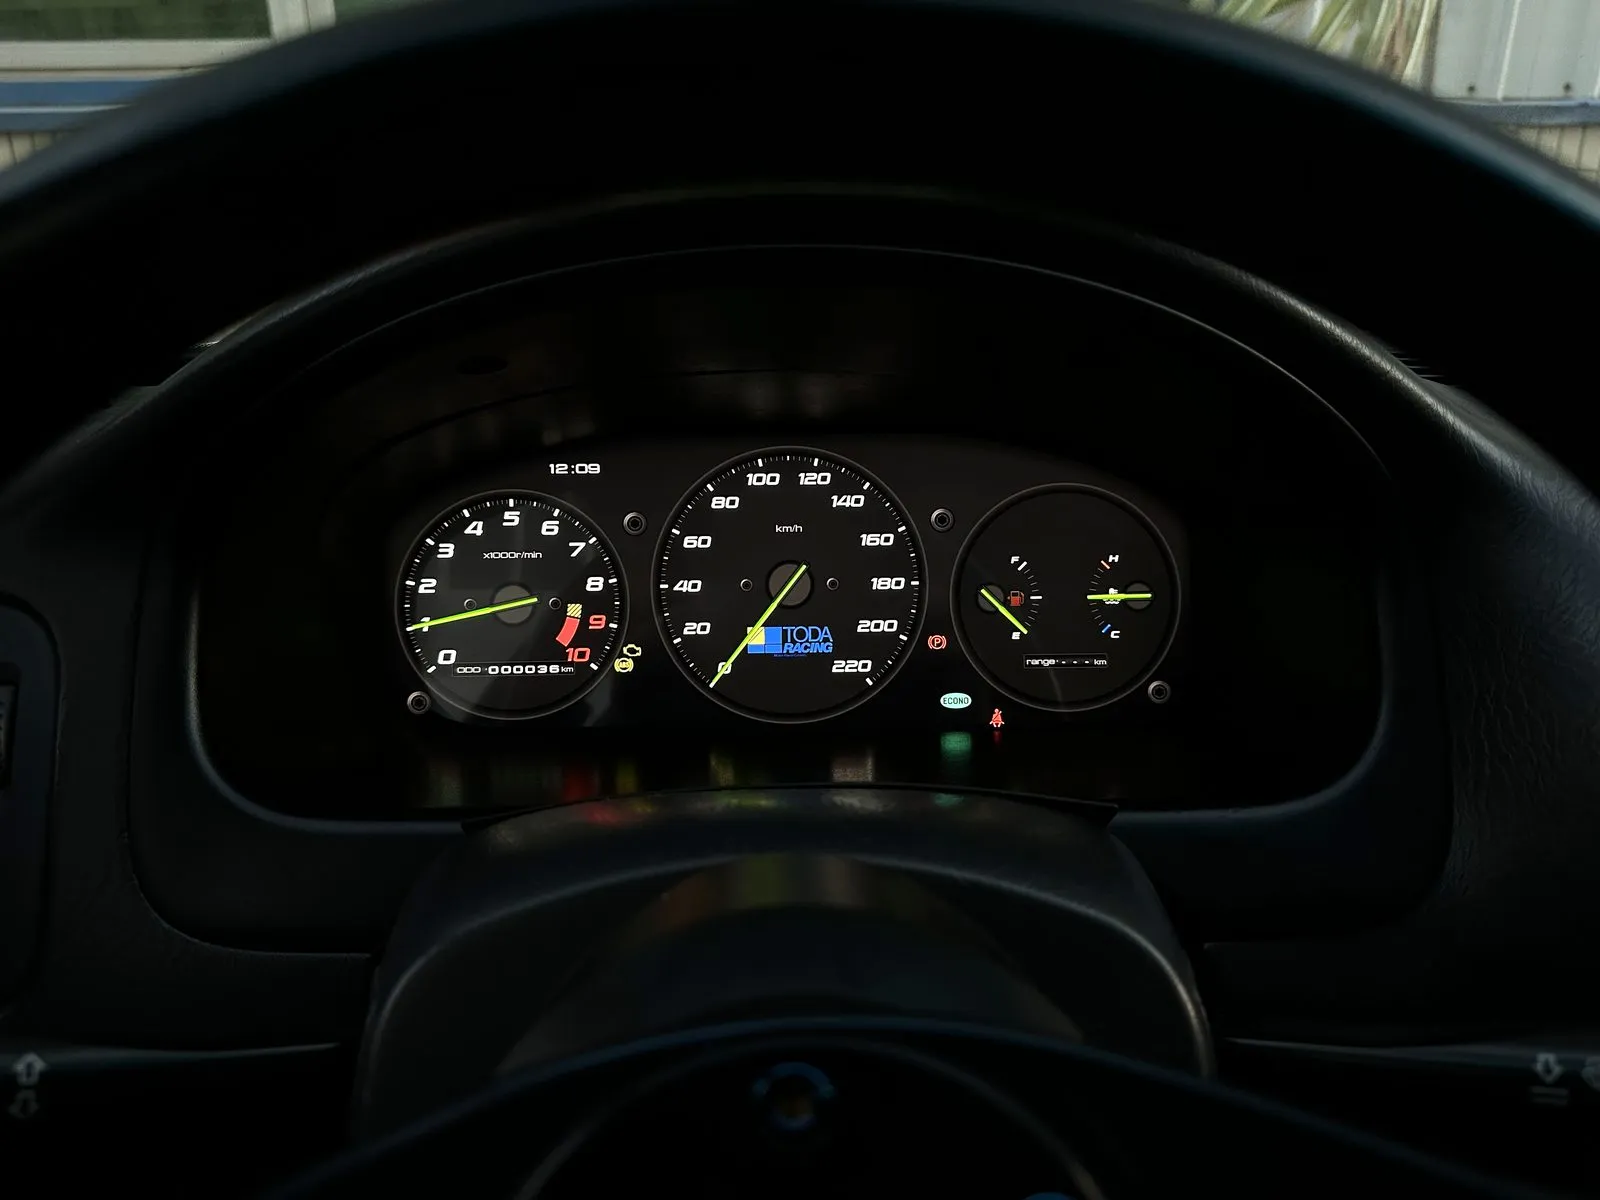
Straight swap in the factory location, no cutting. Five things are adjustable in the settings menu: shift light, gear display, RPM scale, speed scale and language. Ranges and how to use them are below; removal and installation are on the Installation & Wiring page.
12.3-inch Screen, Readable Day and Night
Section titled “12.3-inch Screen, Readable Day and Night”Dual LVDS interface, 16.7 million colors.
- Bright enough in daylight — still readable with the sun straight on it
- Separate night dimming, so it doesn’t glare in the dark
- Operating −30 to 85 ℃, storage −40 to 95 ℃
Daytime. Sun coming in, RPM and speed stay clean.
Night is the same. The backlight follows ambient light. Tunnels and night driving need no hand on a knob; the RPM bar and the numerals settle down on their own.
Six Layouts
Section titled “Six Layouts”Same hardware, different drawings. Three families — three-dial, white face, horizontal bar — with different needle colors and built-in badges.
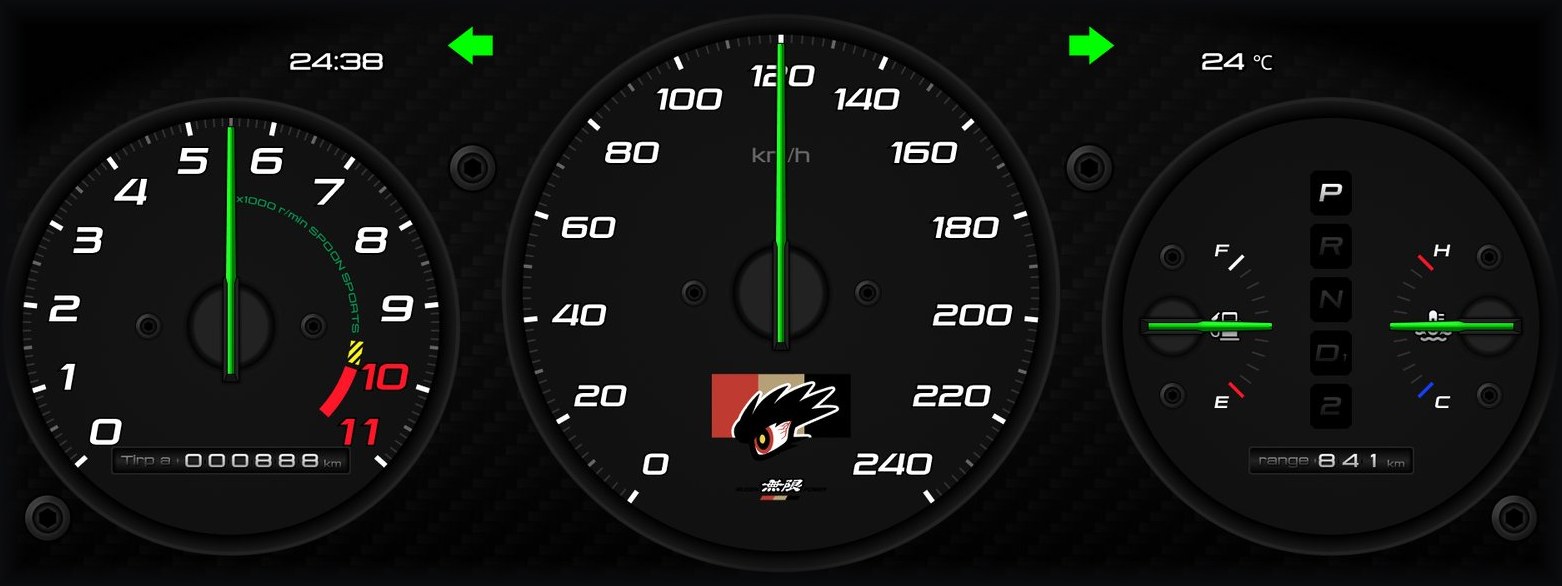
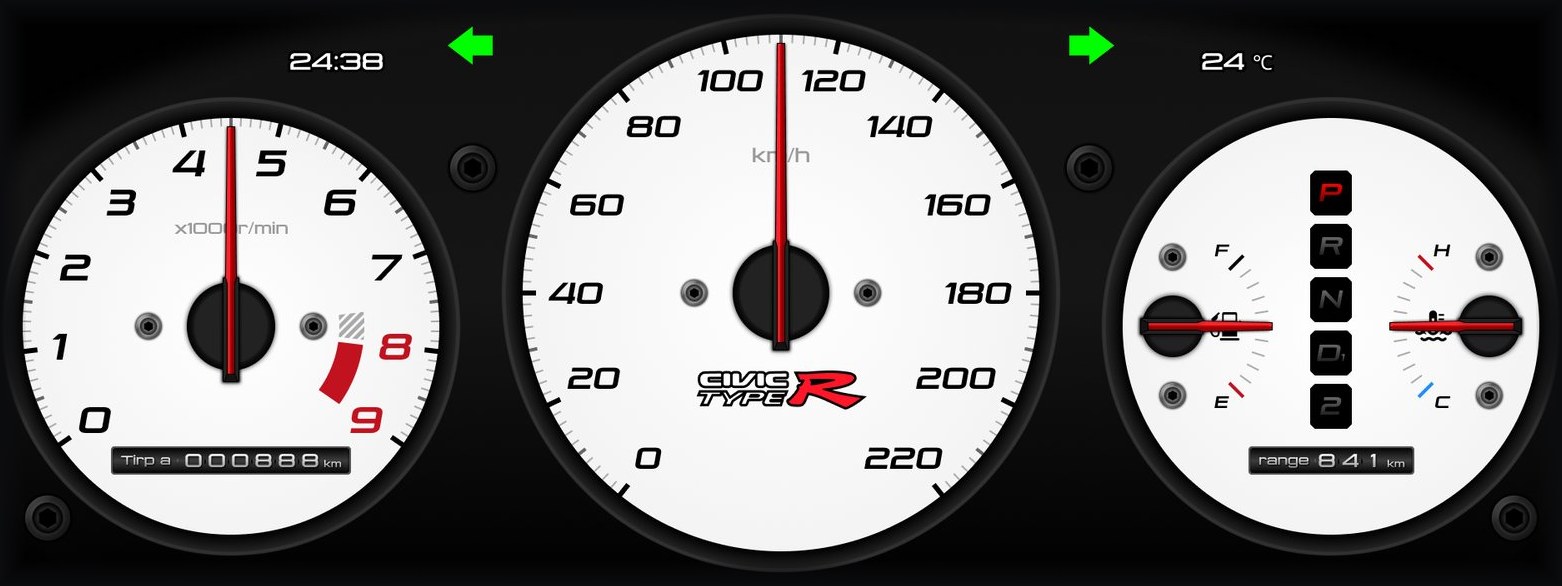
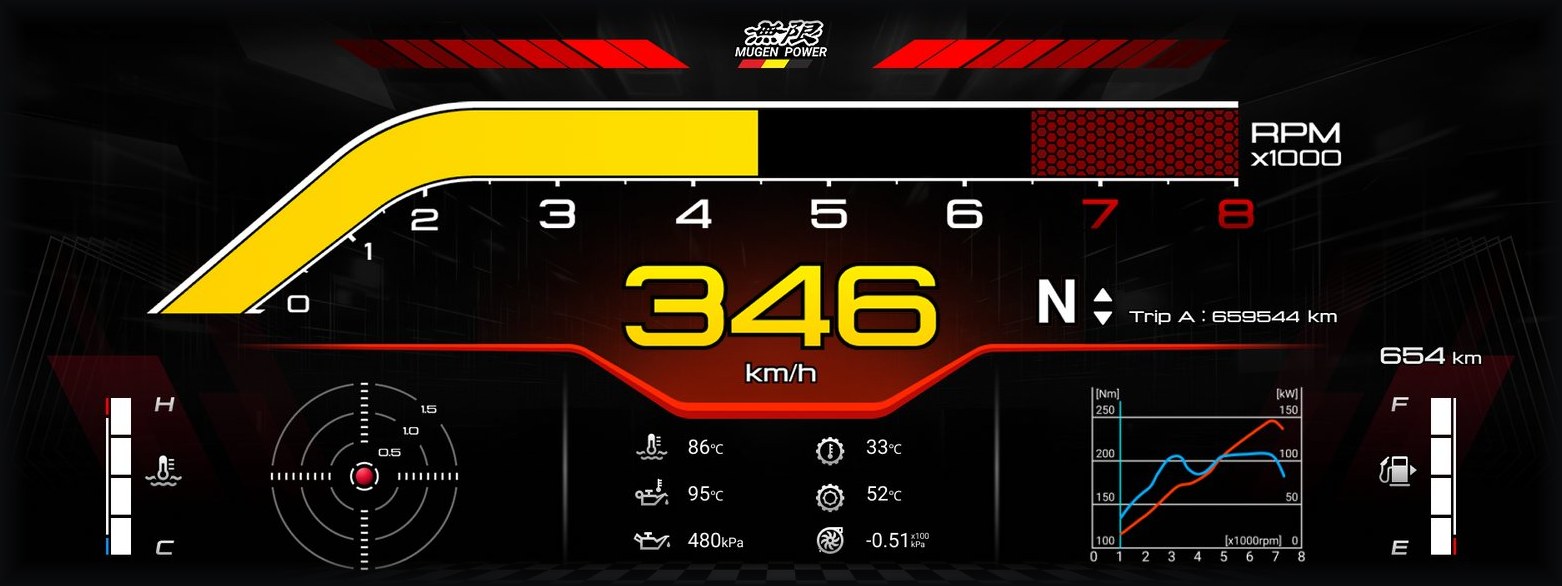
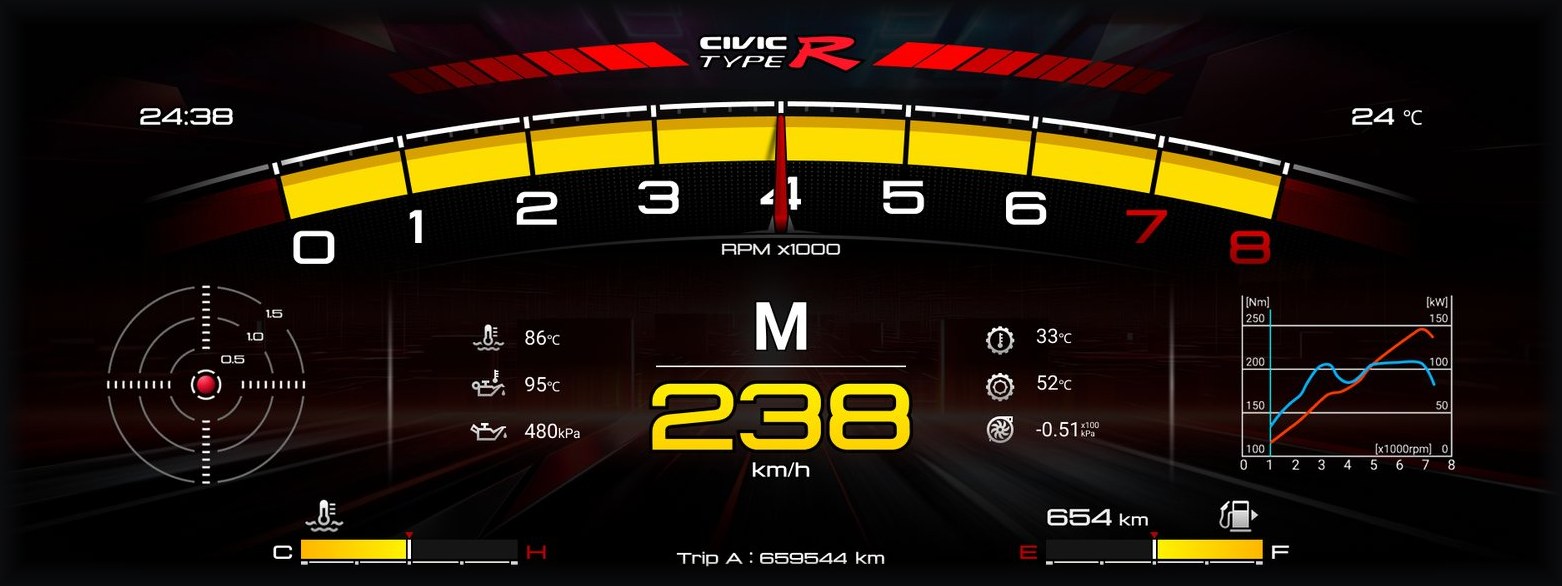
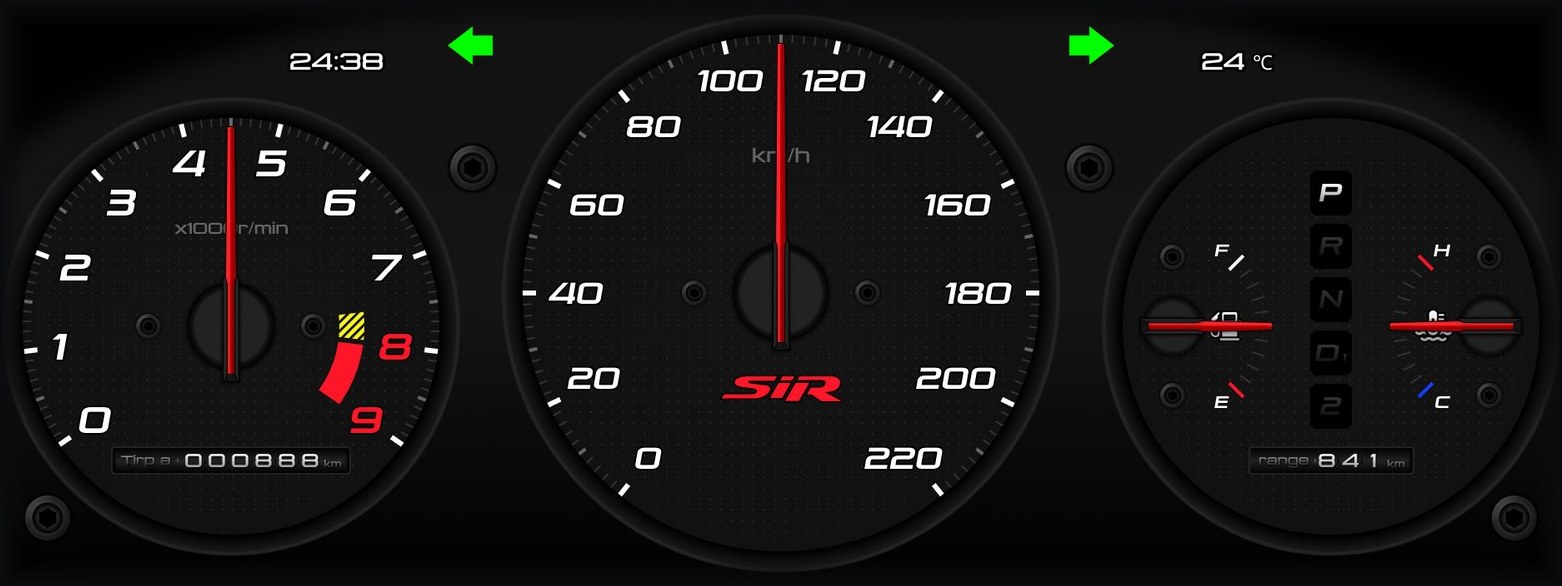
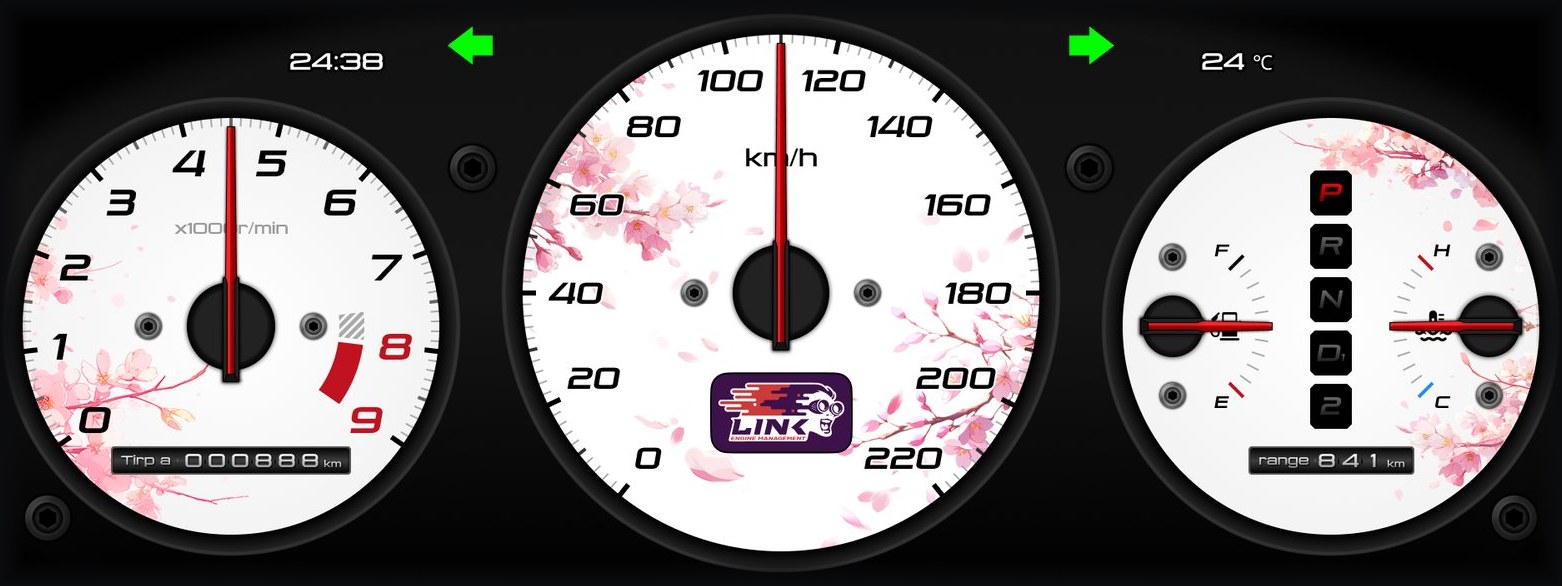
Layouts and badges switch on the cluster itself. Full details on the Specs page.
Custom Vehicle Logo
Section titled “Custom Vehicle Logo”The logos are already in the cluster. They’re just not unlocked from the factory. Flash a package of a few hundred bytes and the picker opens; after that you choose in the cluster menu. No image files to copy, no files to edit.
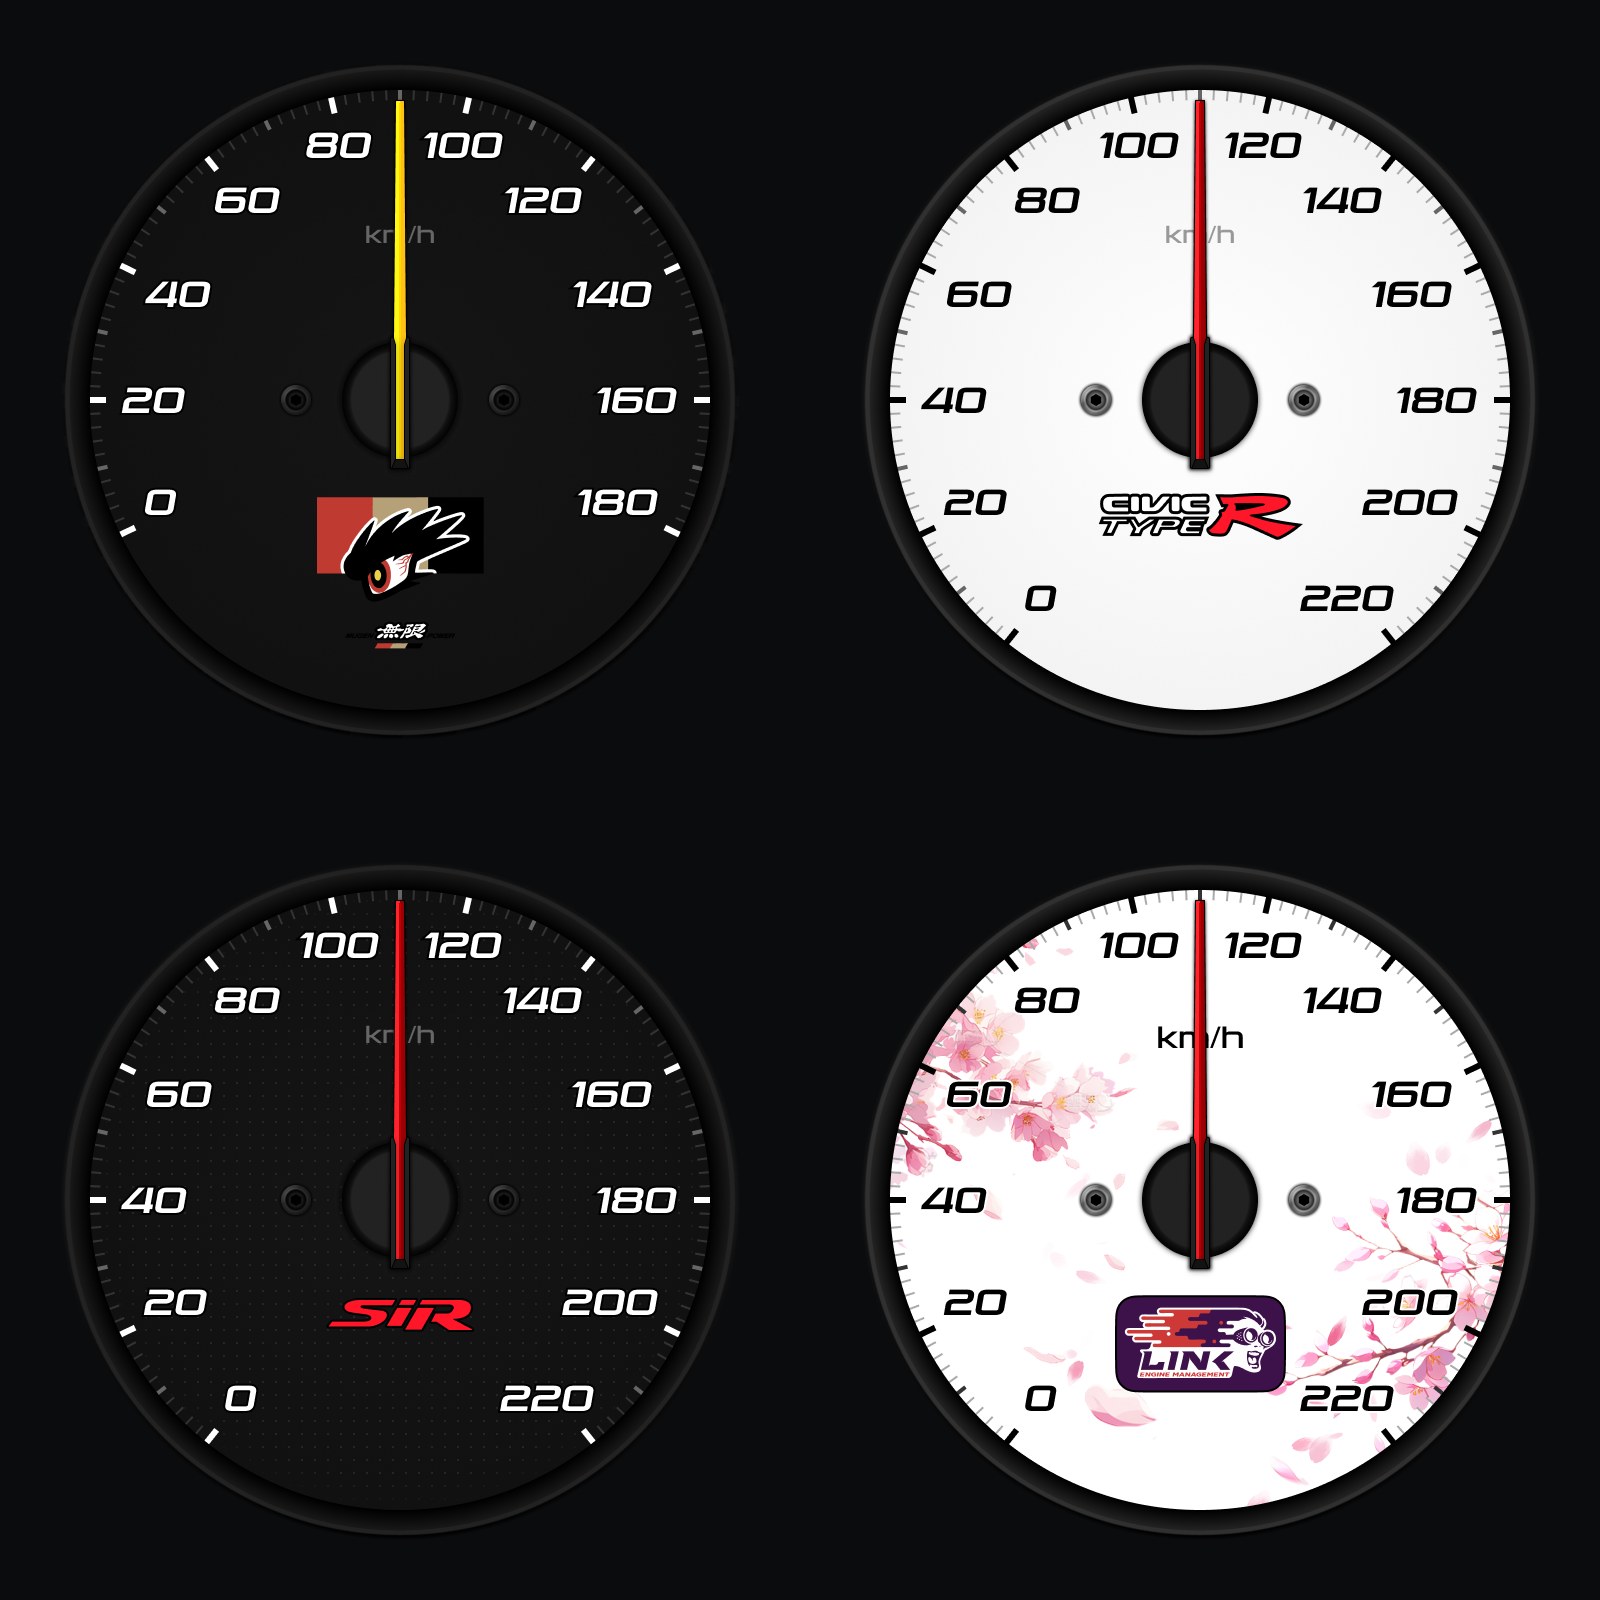
Anything that isn’t in there has to be built into the UI — talk to me. Flashing and troubleshooting: Vehicle logo.
Vehicle Data
Section titled “Vehicle Data”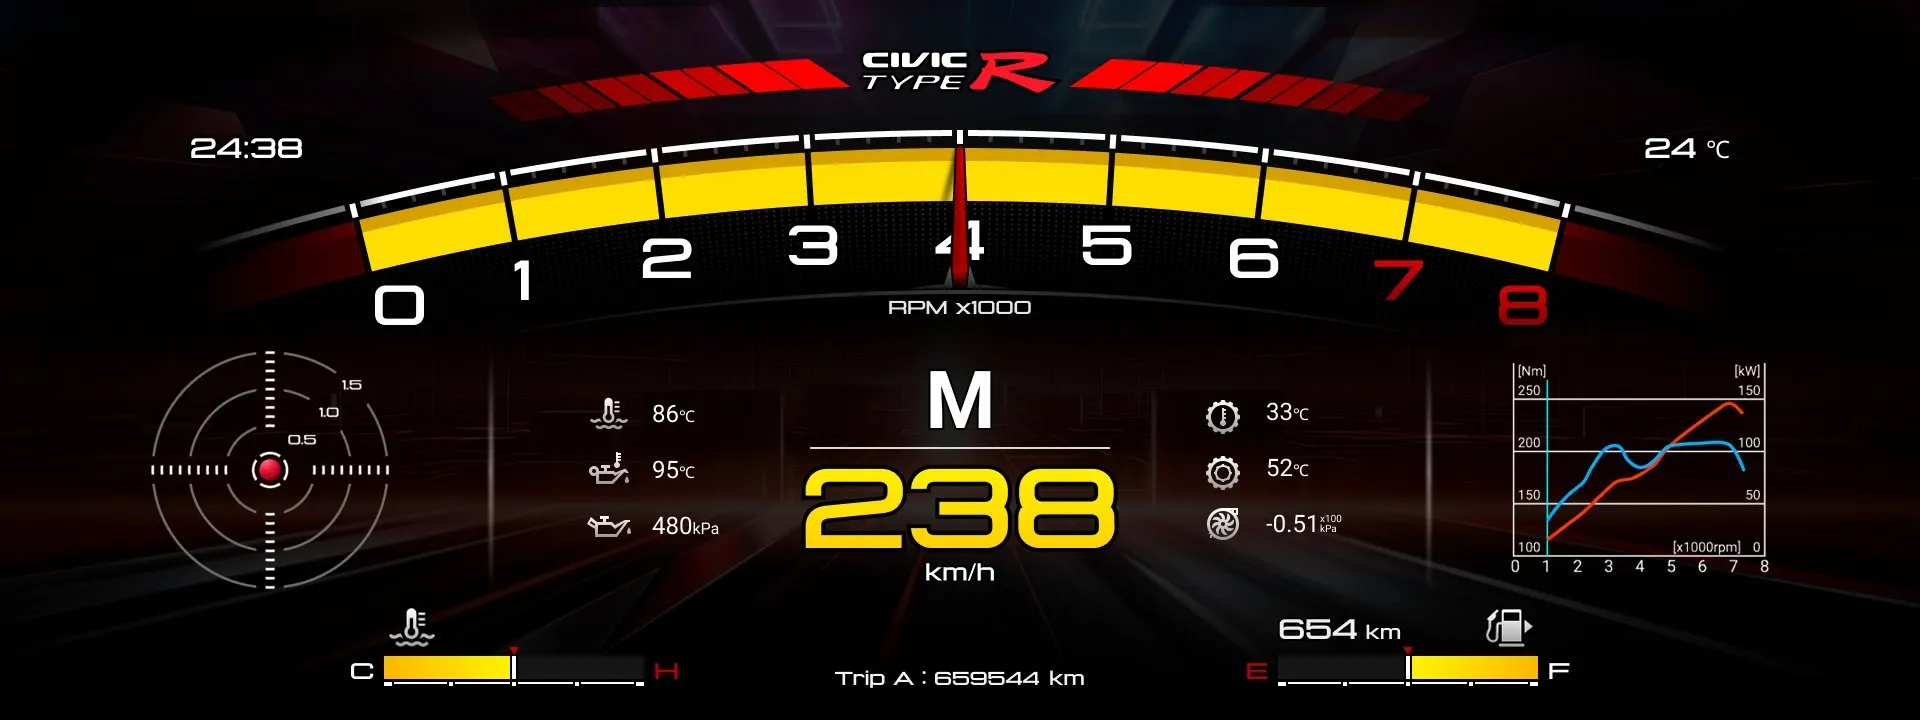
Every reading you need while moving sits on one screen, so you’re not looking down and hunting.
- Live speed
- Live RPM
- Live fuel level
- Live coolant temperature
Live G-Force
Section titled “Live G-Force”A 3-axis MEMS accelerometer sits inside, sampling on its own. It doesn’t read the car’s bus and it doesn’t ask the ECU.
- ±2g / ±4g, 100 Hz — a hundred readings a second
- The red dot is your G position right now
- Launch for acceleration, braking for deceleration, cornering for grip
- Works the same on a car with a swapped or reflashed ECU
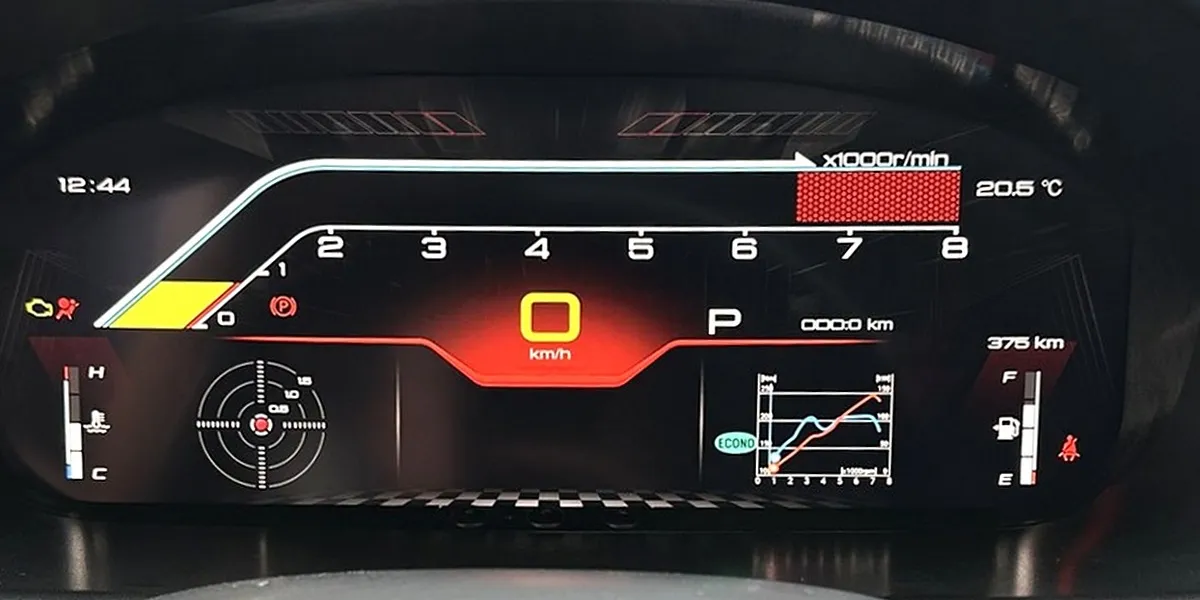
Installed shot: the target sits with speed and RPM, readable out of the corner of your eye.
Display only. No lap timing, no logging.
Manual / Auto Gear Display
Section titled “Manual / Auto Gear Display”The gear display follows the transmission. No hardware change. In auto mode the right dial shows P / R / N / D vertically in the center, current gear boxed. Switch to manual and those letters drop out of the same spot, leaving fuel and coolant.
Both photos below are the same right-hand dial — auto left, manual right:
| Auto | Manual |
|---|---|
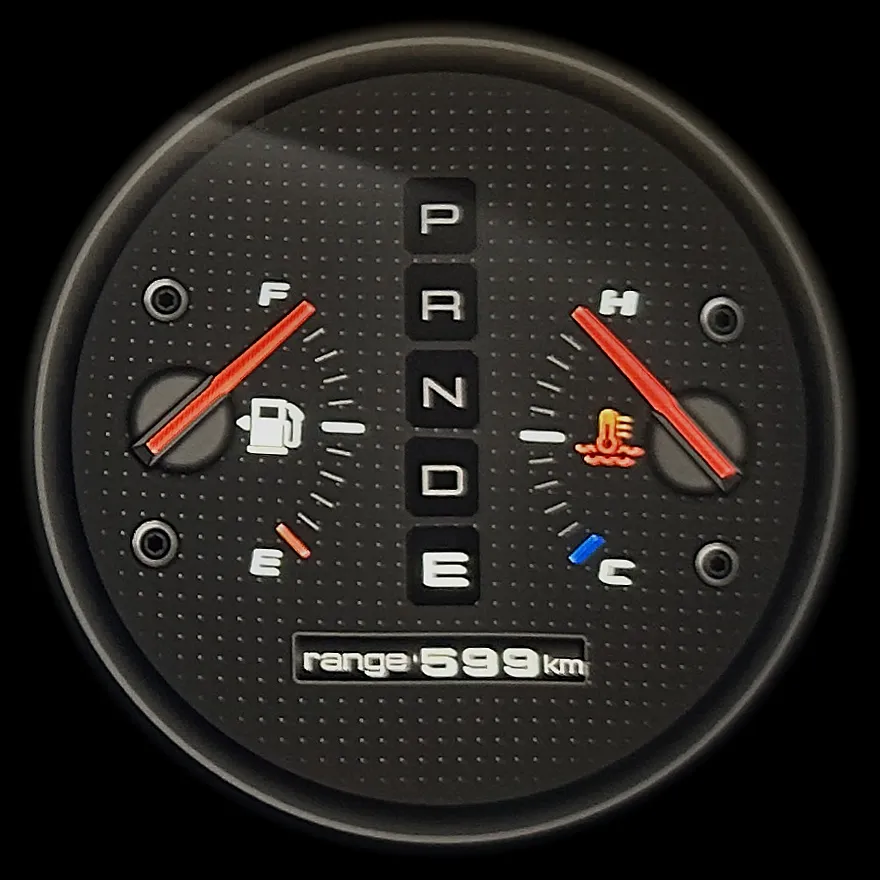 |
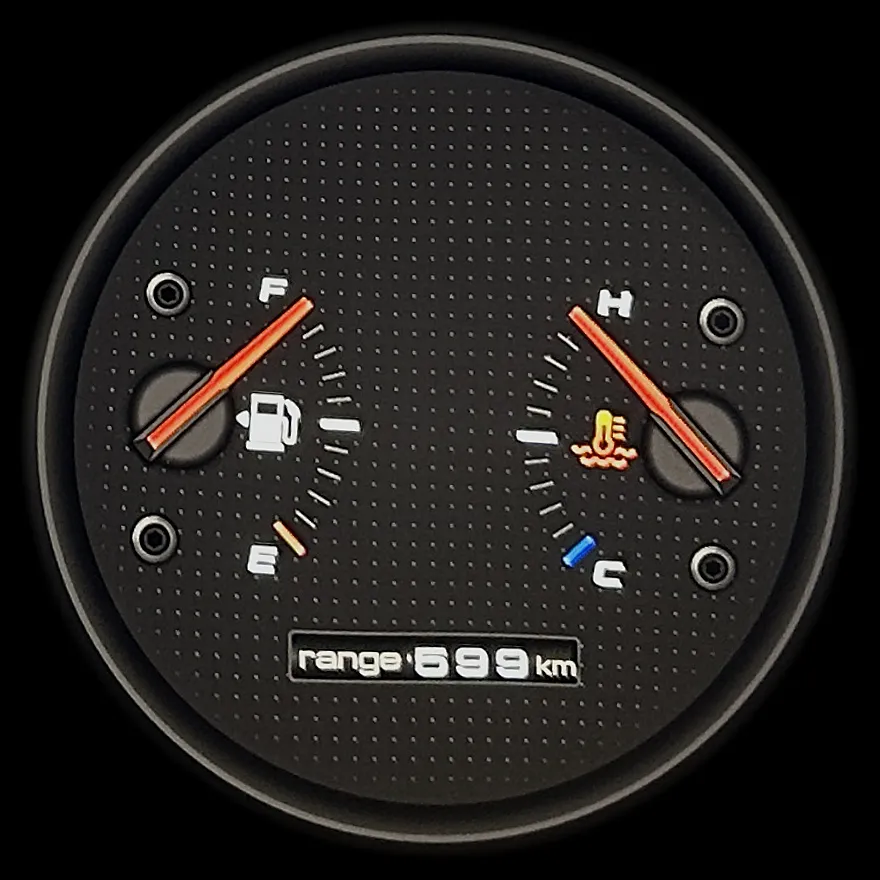 |
| P / R / N / D vertically, current gear boxed | Same dial, same place — the column is gone, only fuel and coolant left |
Adjustable RPM Scale
Section titled “Adjustable RPM Scale”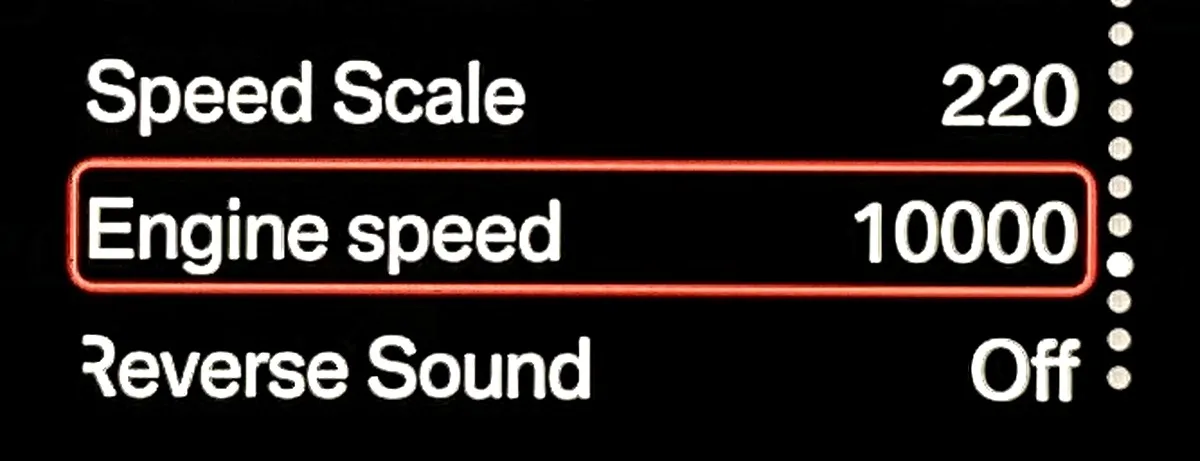
The top of the scale isn’t fixed. Change it in the Factory Settings menu.
Engine speed: the tachometer maximum — 8,000 / 9,000 / 10,000 / 11,000 rpm. Stock redline, a cammed engine, a reflashed high-revving build — pick the setting that matches where the car actually cuts fuel, and the needle lines up with the markings again.
Adjustable Speed Scale
Section titled “Adjustable Speed Scale”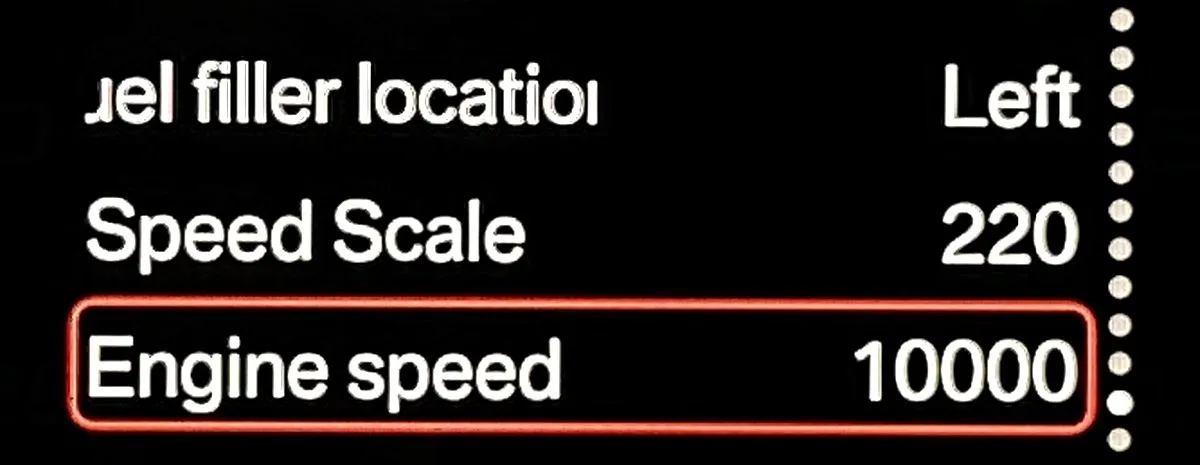
Speed Scale: top of the speedometer — 180 / 220 / 240 km/h. Set it low and the speeds you actually drive get more spacing and read easier. Set it high and the top end stops pinning against the limit.
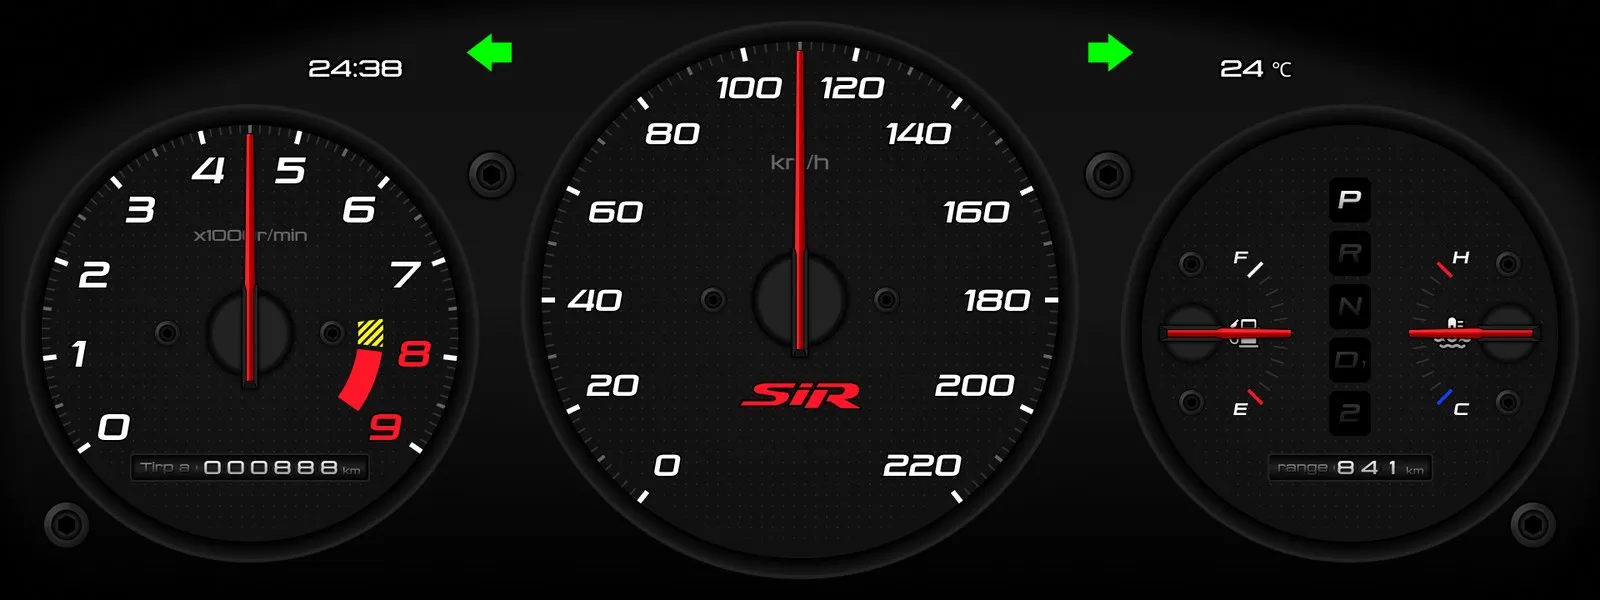
Once applied the dials are redrawn: RPM to 9,000 on the left, speed to 220 in the middle — matching the setting.
Shift Light
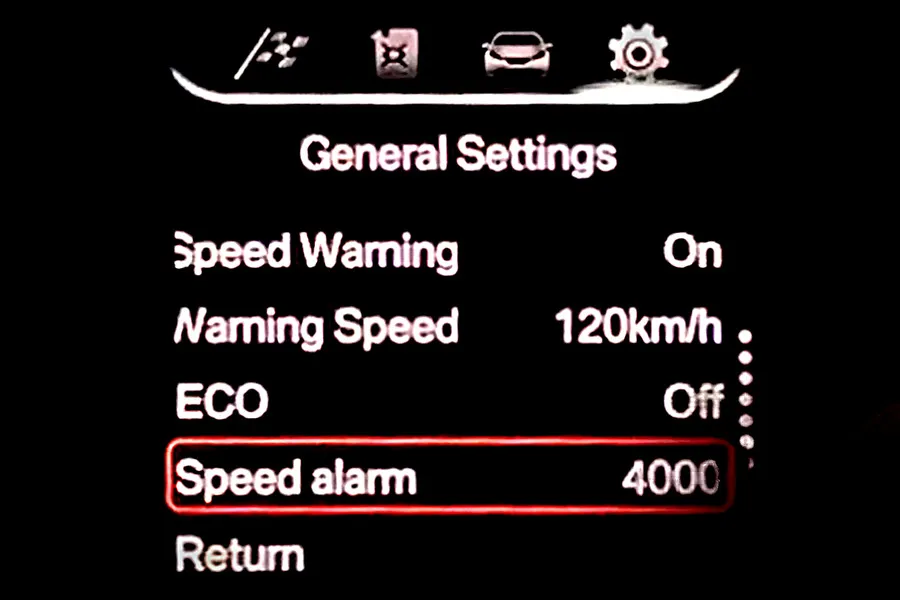
Section titled “Shift Light”In the settings menu, set Speed alarm to the RPM you want the warning at. 4000, for example.
Hit that RPM and a red bar comes up across the top of the horizontal layout and flashes. One glance out of the corner of your eye and you know to shift.
| Settings menu | Installed |
|---|---|
 |
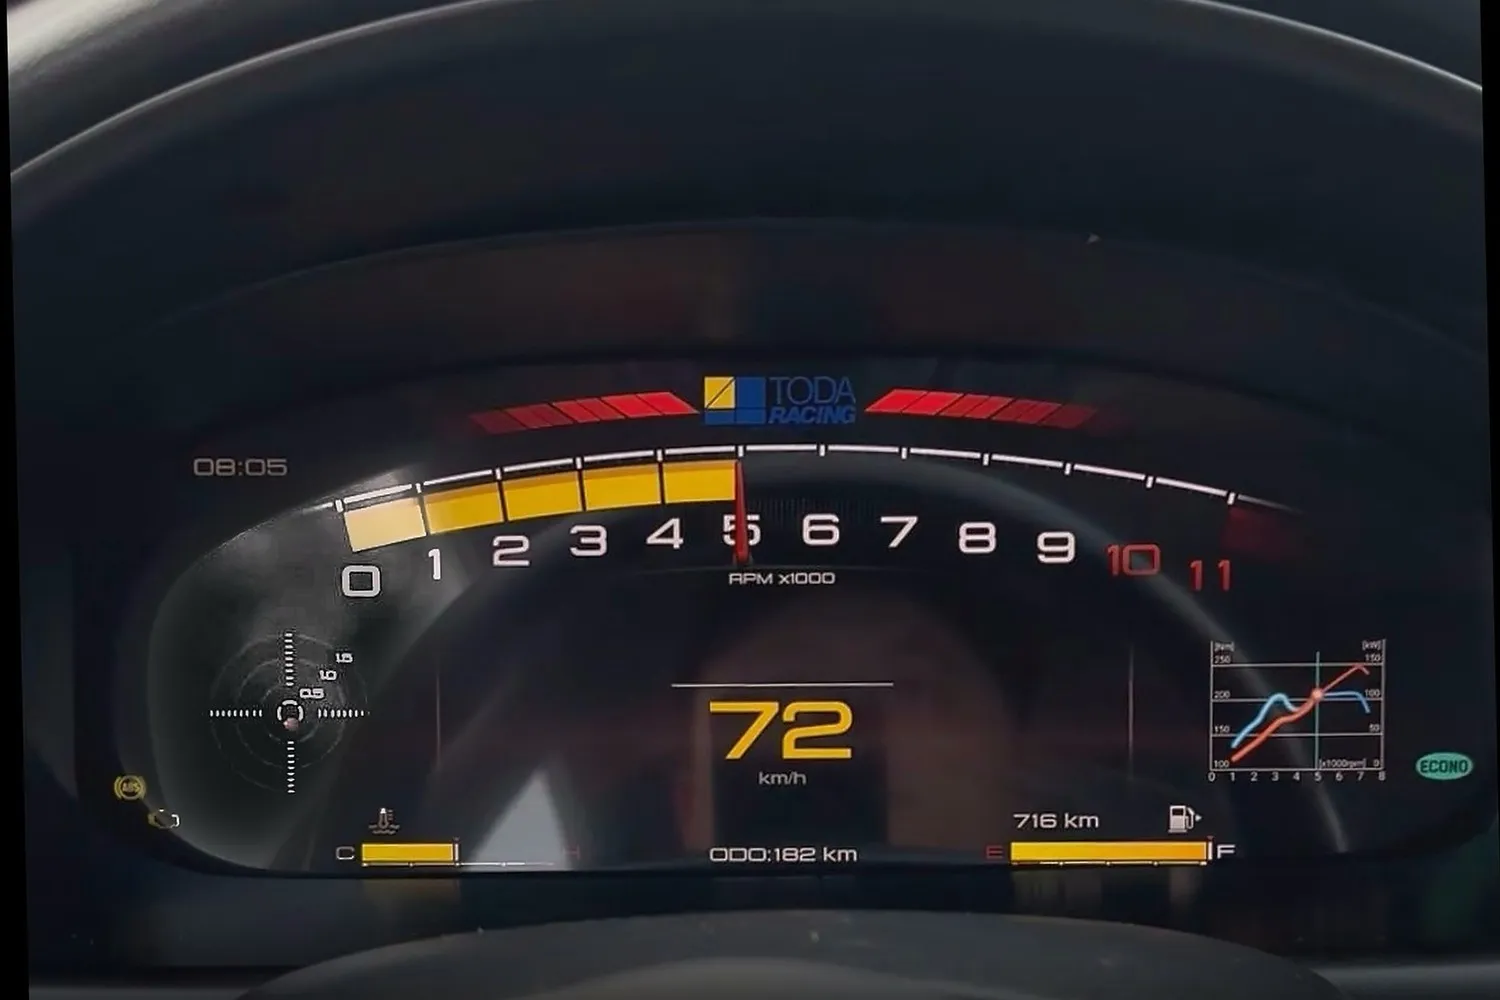 |
| Speed alarm 4000 — the warning RPM goes here | At the set RPM, the top bar flashes red |
Multilingual Menu
Section titled “Multilingual Menu”Twelve languages, switched in settings. Menu items and prompts change with it. Speed and RPM readings don’t.
Export car, right-hand drive car, or an EK that came in from Japan — pick whichever language the driver wants at handover.
Plug and Play, No Splicing
Section titled “Plug and Play, No Splicing”Factory connectors into the factory harness. The original wiring stays put, the car’s electrical system stays as it was, and you can go back to stock at any time.
- Connectors line up one-to-one with the factory plug positions
- Immobilizer, ECONO, ABS and fuel level all plug in where they came from
- No cutting, no tapping, no fuse changes
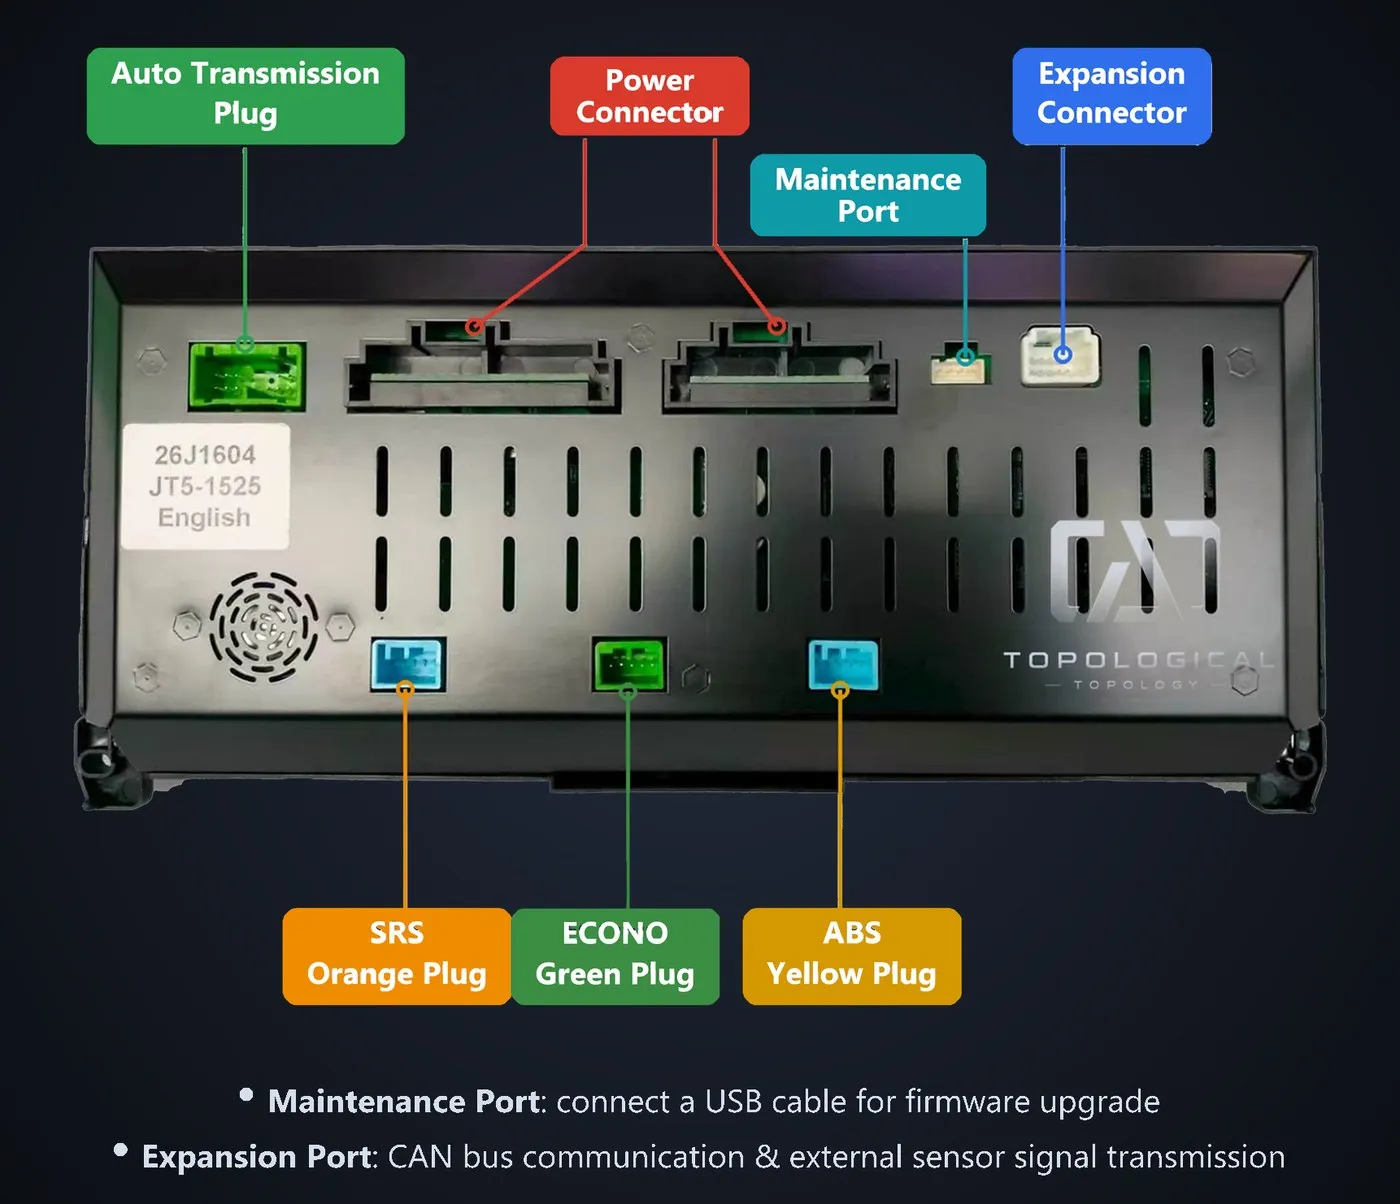
Rear connectors, left to right: automatic transmission plug, power plug, service port (USB firmware), expansion port (CAN bus and external sensor signals), SRS orange plug, ECONO green plug, ABS yellow plug.
Box and Warranty
Section titled “Box and Warranty”- 12-month warranty from delivery
- Have an authorized shop do the install